Sunday, October 31, 2010

Cherry Ripe Heaven

As I stood in the Que at the local supermarket being overwhelmed with boredom I became a slave to advertising as I found myself staring longingly at the selection of cooking magazines that had been strategically placed in eyes view as to draw my attention toward them, having a fetish for cook books and a book shelf filled with them at home it was not long until I gave into my urges, I picked up one of the magazines and began flipping through it, I found myself whisked away to a world of culinary delights, on the front page was a beautifully presented Cherry Ripe Mud Cake, decorated with chocolate and signalling to my brain to salivate just the slightest, as I looked up to see if anyone had noticed my moment of drool, when it dawned on me, my duty when I returned home was to recreate this beautiful specimen for myself, I slipped half a dozen cherry ripe bars onto the conveyor belt loaded with groceries and I began to dream of dancing through a land of cherry ripes, like Homer Simpson's chocolate land, gnawing at cherry ripe puppies and drinking from fountain's of liquid chocolate.

I baked this cake with all the love in the world, I sat in my lounge and was driven mad by the smells drifting from my kitchen as the cake baked in the oven. Best of all I watched as my colleagues at work devoured the cake, telling me that I have in dead missed my calling and that I should open my own cake shop. I bake because I love it, I love it because I find the process of cooking relaxing and the finished product is my reward in the end. I am now going to share this cake with you.

250g butter chopped
400ml can coconut milk
200g dark chocolate melts
2 cups of caster sugar
2 eggs, lightly beaten
1 teaspoon vanilla extract
3/4 cup self-raising flour
1 cup plain flour
1/4 cup cocoa
2 x cherry ripe bars coarsely chopped
CHOCOLATE GANACHE (my own little touch)

Step 1. Preheat the oven to 150 degrees C. Grease and line a 20cm round cake tin. In a bowl combine the butter, coconut milk, chocolate and sugar, place the bowl and cook in the microwave at one minute intervals, stirring each time until the chocolate and butter has melted. Set aside to cool.

Step 2. Whisk the butter and vanilla through the cooled chocolate mixture. Sift the flours and cocoa together and add to the chocolate mixture folding through gently. Stir through half of the cherry ripe.

Step 3. Pour the mixture into the lined cake tin, top with the remaining cherry ripe, bake for 1 hour 45 minutes to 2 hours depending on your oven, test if your cake is ready by pushing a skewer into the middle of it, if it is ready it will come out clean. Cool in the can tin for ten minutes and then lift out onto a wire rack to cool completely.

Step 4. Chocolate Gnache: Combine 250g packet of dark chocolate melts with 60g of butter and 1/4 cup of cream. Cook in the microwave until the chocolate has melted, stir well until smooth and then place in the fridge to cool and thicken stirring frequently to maintain smooth constancy.

Step 5. Cut a panel of grease proof paper to fit the width and length of the cake, lay it out on a clean surface. Melt a little chocolate, stir until smooth, pour evenly over the prepared paper and smooth , set aside to harden.

Step 6. When the cake is cold, ice it with the gnache, pipe swirls of ganache on top of the cake and decorate with more chopped cherry ripe. Peel the set chocolate from the greased proof paper and arrange around the cake, use a little of the gnache to fasten it onto the cake.

Enjoy your finished product and share it lovingly with your family and friends, watch as they are wowed by your presentation and listen as they oooh and ahhhhh with every bite. I trust that you will have as much fun baking it as I did. Well, that's enough gabble from me, I must be off now to prepare spaghetti and meat balls for dinner, until next time happy cooking and best of luck.

Tuesday, September 28, 2010

Simply Nougat!

Have you ever attended an Italian Wedding reception and been gifted colourfully wrapped nougat? The presentation alone grasps your eye and you are instantly excited about unwrapping the lollie in anticipation that it is as good to eat as it looks.
As a Wedding Coordinator, or as my boss calls it, a "Wedding Fairy" I have on a number of occasions hosted Italian Weddings, I have salivated as I opened containers filled with nougat, the sweet, sugary sent wafting into the air after being cooped up for hours in its plastic cage.
 
I have promised myself for years that "one day" I would attempt making nougat, of course one day turns into the next and then, after years of procrastinating my attempt of making nougat has still not been achieved, that is until last week when finally it was time, I had hosted a wedding and after sneaking a piece of nougat decided that if hundreds of people from across the world have attempted it and been successful that I too should be able to.
 
First things first I asked my good friend google for a fool proof nougat recipe, after punching the enter key, pages upon pages of "relevant articles" appeared. Not being one to search through every recipe to find the "Ultimate" one I settled on the "Best ever Nougat recipe" with a label like that how could it be wrong? I read through it step by step, I was unaware of how simple nougat was to make and that it contained just a small amount of ingredients.
 
One of the ingredients for nougat is edible rice paper, I searched high and low for this rare commodity, living in a small town made it even more of a challenge, I was eternally grateful for the help of a local cake decorator who set me in the right direction, with her help I found my rice paper in a gourmet deli, it was proof that I am indeed a mushroom, unaware that a treasure like "Victors Gourmet Deli" even existed in Cairns, I became side tracked beyond belief, wrapped up in the thought of devouring gourmet salami's and cheeses, wanting to try a little bit of this and that. After my not so quick venture to the shop to pick up glucose syrup, almonds rice paper and cellophane I settled in my tiny kitchen and began to prepare my sweets, it was the first opportunity for me to use the sugar thometer my husband had given me as a gift months prior.
 
The recipe stressed that the use of hand held beaters is a deffinate no, no, it suggests that the nougat would become to thick whilst beating it and the motor would burn out, only having hand held beaters I chose to ignore the suggestion and I used them. I found that they coped well, being of a high quality the motor had been guaranteed for a life time, I'm not sure how long a life time is for an inanimate object but I can say that they lived up to their reputation.
 
Another point stressed in the recipe is to refrain from deviating from the instructions, the importance of following it to the letter is of  the up most. I ignored this advice in my first attempt and boiled my sugar syrup mixture to a measly 140 degrees, my finished product although delicious and moreish was chewy and terribly hard to cut, even after chilling it in the fridge our resident pastry chef at work still had issues cutting it for me. 
 
My second attempt was perfect, I refrained from chopping the nuts and boiled the syrup to 150 degrees, after beating it, it was smooth and creamy in texture and as the recipe suggests fiddly to spread but totally worth it. I did not even need the help of our pastry chef to cut it, the bread knife used in a sawing motion was a dream.
 
Don't be put off by how nougat looks or horror stories you have been told that have traveled through the grape vine before reaching you, try making nougat, if not today why not some day in the future? It is simple to prepare and make, just make sure that you acquire a sugar thermometer before you do. Making lollies is allot of fun, it may require you to act quickly in some stages but the finished product is the plus, make sure if you have children to stress to them to stay away from the sugar syrup when boiling it, if it was tipped onto the skin it would burn into the young flesh and set on it.
 
I have had trouble controlling my urge to eat nougat since I have made it, one small piece becomes two and so on, I must admit that eating it doesn't bother me in the slightest, I enjoy it, and am sure that you will as well, keep up with the cooking, I hope that you feel inspired. Until next time create, create, create! 

Friday, September 17, 2010

Cheesecake mmmm

There are times when I am out for coffee with my friends and find myself staring long and hard into the cake cabinet drooling over beautifully presented cakes that have been strategical placed as to catch the eyes of those waiting to be served, any form of calorie counting instantly go out the window as my gaze deepens with desire, as I procrastinate over which dessert to thicken my hips with I always find myself leaning toward the very creamy and Moorish delights of cheesecake.

 Although I enjoy spooning cheesecake into my mouth whilst oohing and ahhing as it slides down my throat whilst I sit with my friends in the ambiance of my favorite coffee shop, I find it particularly satisfying to make a cheesecake in the comfort of my own home. I am a huge fan of the no bake cheesecake, filled with condensed milk and lemon juice, it is, as the expression goes as easy as pie to make.

Firstly,  turn one packet of Butter Crunch biscuits into crumbs, these days people use a food processor to do so, being an old fashioned girl and not being lucky enough to own such a tool, I place my biscuit's in a large zip lock bag and beat the living day lights out of them using a rolling pin until they resemble fine bread crumbs, I place them into a bowl and add a teaspoon of Cinnamon and 125g of melted butter, I mix them until they are well combined and then turn my crumb base into a lined spring form pan, I press them into shape using my fingers and palms and then place my base in the fridge to chill, I then beat 2 x 250g tubs of Cream Cheese using an electric mixture until smooth, to that I add one tin of condensed milk, beating once more until they are well combined, I add the freshly squeezed juice of two lemons that have had 2 level table spoons of gelatin dissolved in it, and as repetitious as it sounds I then mix it all until well combined, to that I fold in half a 600ml tub of thickened cream, I pour my luscious creation into the prepared tin, I sprinkle it liberally with cinnamon and then place it in the fridge to chill until firm.

Whilst waiting impatiently for my heavenly dessert to chill I curl up on my couch with the bowl and a wooden spoon, I scrape the sides of the bowl with the spoon and eat the left over delights, fending off the kittens as I do so, for if for the slightest moment I drop my guard they would pounce at the bowl and lick it clean leaving no trace of there ever being a cheese cake made in it and causing a ruckus as they bicker over who will be first in line in the pecking order.

Once chilled and my penance in patience has been served I remove my sinful creation from the fridge, I unclasp the spring form pan and remove my cake, I cut it into slices and serve it with swirls of fresh cream and strawberries all along promising myself that I will in deed be good and eat only a slither, with that slither of course being backed up by yet another slither until I have consumed a full slice, the little Lucifer sitting on my shoulder convincing me that it is the right thing to do, besides I wouldn't like to upset the chef would I?

Cheese cake is dead easy to make, it is a perfect dessert for family get togethers and can be dressed up to be fancy by setting jelly on top of it once it is set and serving it with cream and fresh fruit or can you keep it simple and sweet, by serving it with a scoop of ice cream .

Cooking is a joy and sharing that experience is brilliant to everyone that is involved, share the experience of making a cheese cake with your children if you are lucky enough to have some, let them man the beaters and watch as the batter spits from the bowl and covers your kitchen bench with condensed milk, watch them as they press the biscuit base into the pan and help them as they lick the bowl when you are done. If you don't have any children of your own why not share the experience with a friend.

I must be off now, I have the aromas of a chicken and asparagus quiche filling my home and I must go and tend to it, happy cooking to all of you that are reading this and I hope that your baking experience is a successful one. Till the next time I write, good bye.

Tuesday, September 7, 2010

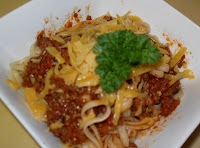
Meat Ball and Spaghetti.. all covered in Cheese!

Well I might be fibbing in the title just a little, this recipe does not contain meat balls, it is however good old fashioned spag bol. Everyone that I know has their own take on Spaghetti, it has feed many of us through years of University and bachelor hood, it has soothed our cravings for comfort and eased our heads after a big night out, we reheat it the next day and make toasted sandwiches from it. Some of us like to use Spaghetti simmer sauces, others, like myself like to create our spaghetti from scratch.

I don't know how long spaghetti has been a staple meal of thousands of families across the world, I can tell you that I have been creating it since a teenager, forever experimenting as to create the perfect batch of noodle slurping goodness. After a crazy day at work recently and finishing a little earlier than normal on a Sunday afternoon my husband and I decided that spaghetti would be the perfect easy meal for our tired family. As I delved deep into the abyss of my freezer like a carnivore in hunt of its prey I found a surprise tray of minced beef, I pull it from it's frozen waist land and gently defrosted it in our trusty microwave.

Whilst our surprise package of minced beef was being buzzed in a circular motion in our trusty tool of modern technology my husband and I diced an onion, minced an excessive amount of garlic and picked from our garden fresh, basil, lemon thyme, oregano, parsley and spanish sage. We browned the onion and garlic in a large heavy based saucepan and once defrosted we added the star of the dish, the minced beef. When the beef had browned and it appeared to be cooked we added a large tin of tomatoes, and half a jar of tomato paste that gave the dish a thick, rich appearance, to that we added a good splosh of red wine, unfortunately we had to sacrifice a glass or two of a 6 year old bottle of merlot that we had been drinking sparingly over the course of the previous day. Once the tomatoes appeared to be disintegrating we added half a diced egg plant, an amazing vegetable when added to other flavors, the flesh, like the tinned tomatoes disintegrates in the pot and adds a wondrous texture and flavor to the completed dish, last but not least we add a grated carrot, some salt and pepper, with a sprinkle of my secret ingredient celery salt. We allow our creation to simmer away for half an hour, at this time we pop garlic bread in the oven to cook. Now is the perfect time to boil water, thats right, you guessed it, in another heavy based pot. We add to it some cooking salt, and a small amount of olive oil, it has been brought to my attention that it is no longer the done thing to add oil to pasta as it cooks, it is apparently un nessacary, I believe that it still makes a difference and, being a creature of habit I will keep doing so until the day I am dead and buried. Once the water is bubbling away I add to it good pasta, you can taste the difference and it makes your meal that little more special, we boil it until it is aldente and rinse it in hot water as to prevent it from sticking together.

We scoop the pasta into bowls, we top it with a generous amount of spaghetti sauce, some grated cheddar cheese and place by it's side a piece or two of crunchy garlic bread.

In our family this meal is traditionaly eaten on the couch, it is what we call a "lazy meal" and eaten whilst listening as David Attinbrough narates one of his wild adventures from lands unbeknown to us.

This particular attempt was as I say every time that I make spaghetti "the best batch I have ever made", I think it was the extra love of a second pair of hands that added to the goodness. Spaghetti is a heart felt dish, it reminds many of us of growing up, of meals that mum makes and awakeness memories of leaving home and learning to fend for ourselves, it is easy to make and satisfying, it is also different in every household I have ever visited.

Today's challenge is to dust off your spaghetti recipe, if you don't have one I'll let you phone a friend. Make a batch and slurp the noodles into your mouth whilst watching a documentry on the telly. Until then, happy cooking adventures to you all and remember that you don't know how it will turn out until you give it a go!

Wednesday, August 25, 2010

Slowly does it!

I have recently found myself involved in a conversation over slow cookers and their amazing ability to make meal times in the kitchen a pleasure instead of a chore. I was at ore of the idea of placing raw ingredients into a pot, leaving for work and upon my return eight hours later having a flavorsome creation waiting for my family to consume with no fuss attached.

Being the compulsive person that you may be discovering that I am I found myself the next day standing in the kitchenware section of Myers staring at a large range of slow cookers all with different volume capacities and all offering something a little different. After speaking with the well presented salesman and weighing up my options I found myself leaving the store with a giant box, hiding within it a mythical tool of which promised to make dinner times in my house simple and fuss free. Never owning such a piece of equipment before I also purchased "Slow" a cookbook filled from start to finish with slow cooker recipes, the tool to accompany my new and exciting play thing.

Desperately wanting to road test my toy, I dropped into my local butcher and purchased some stewing meat, as if a murderer plotting his next kill I drove home and buried my nose deep into my new cookbook for ideas on how to master my new kitchen gadget. Full of inspiration and eager to see my slow cooker at work I plugged it into the power point, turned it on to high, and loaded it with onion, lamb, garlic, egg plant, tinned tomato and white wine, I mixed together the ingredients with a wooden spoon, placed the lid back on the cooker and as if a woman possessed I stood over my slow cooker, waiting for something to happen, forgetting that, it is after all a "Slow Cooker" and no matter how long I stood over it looking intently through it's lid I would be waiting all day for my meal to cooked, yet as if hypnotised I found myself returning to it, opening the lid and looking, hoping that something had changed.

After visiting my friends at their humble abode I returned home, as I turned the lock and entered the lounge room I was greated by the smells coming from my kitchen, it was alive with the aromas of stew,  awakening the sensors of my family, prodding at our bellies following us through our tiny home and becoming trapped in all the nook's and crannies, urging us to sit and eat. I am pleased to say that my first slow cooking experience was a success, and as like all stews it was even better the next day.

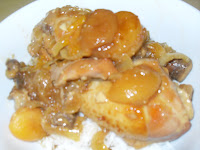
I have since cooked many things in my cooker, Corned Beef, Spaghetti, Apricot Chicken and Beef Curry just to name a few. All of these meals were delicious and a delight to come home to after a massive day at the office. It is true, slow cookers are a marvel for busy working class families, and I am sure that I have many more very slowly cooked meals to look forward to preparing and devouring in the future.

If you are reading this and have a slow cooker why not plan to slowly cook a meal some time in the future. Tonight I made Korma Curry that we ate with Nann bread and Poppadom's, delicious! I am looking forward to reheats tomorrow, delicious delicious!

Enough rambling from me, enjoy creating and eating your delights, get slowly cooking and remember simple meals are effective meals.

Thursday, August 19, 2010

Chicken Soup for the Soul!

There are some foods that hold magical and wondrous powers, chicken soup would be the Yoda of these foods "Delicious and nutritious it is hmmmm."
 At some point of time in most of our lives we have been ill and a friend or family member has nursed us back to the land of the living through the healing powers of chicken soup. I am not sure weather it is the nutrients that we boil from the frames of chickens whilst making the stock or the love of the individual that prepares it for you, I do know however that when I eat a mouthful of hot chicken soup and slurp the fluid into my mouth a healing process takes place instantly, as if every mouthful that I consume is absorbed by the virus or flu that I am battling and an army of powerful healers attack and destroys the now weakened and vulnerable illness.
The warmth of the soup as it slides down our throats and trickles into our belly's is unique, it leaves us craving more and as we sniffle and cough from our unwelcome cold, we can not help but to smile between mouthfuls, wiping our sore, swollen nose before going back for another bite.
I made chicken soup for a family member just yesterday, feeling god awful and spending the day on the couch I offered those magical words to him "Would you like me to make you some chicken soup for the soul" he rolled over looking up and replied by saying "Yes please". I then ducked down to the supermarket in search of chicken frames only to learn that they do not sell them in the deli any more, apparently they are now a butchers line, that is fine by me, I am not fussed by who's line the frames may be on, what I am fussed about is finding those frames so I can keep a promise to an unwell member of my family, Lenard's chicken to the rescue! I purchased four chicken frames for the bargain basement price of $1.50, spending such little money on a miracle is glorious yet it did leave me feeling cheap and nasty.
When I returned home I placed my chicken frames into a heavy based pot, along with them I added enough water to cover and a great dose of white wine. From my garden I picked an assortment of fresh herbs, basil, thyme, oregano, Spanish sage and parsley, I bind them together with cotton and placed them in the pot, to follow I added a chopped onion, garlic and ginger, the leafy tops of celery, a carrot, some salt, pepper and bay leaves. I then left them together to boil away in their own party in a pot for an hour and a half. When the bone begin to crumble I then remove all of my then soggy ingredients and discard them. I add what ever vegetables I find lurking in my crisper, a carrot, swede, a potato, celery, corn kernels, sweet potato and some tomatoes, I dice them all into chunky cubes and add them to my pot of wonder, I pull from my pantry a tin of four bean mix, strain it and then add it to others boiling away, I add pasta, I used spaghetti that I broke into tiny pieces. Don't forget to add the star of the show, that of course being the chicken, I add half a dozen lovely leg, I boil my soup until the chicken falls from the bone and the pasta is soft, I then ladle it into soup bowls and serve with fresh buttered bread.

My usually loud house hold becomes silent as my family sips, slurps and bites into the magical, blissful creation. You do not need to be sick to enjoy chicken soup, you can create it and enjoy it when ever you feel the urge. I am about to reheat a bowl for myself now, I invite all of you who read my blog to join me in creating your own version of the Yoda of the food world, so don't just sit there, get to it, go on, shew and most of all enjoy it!

Friday, August 13, 2010

Devonshire Tea!

I can remember as a child watching as my mother gathered up ingredients for scones from the pantry, all her baking ingredients were stored in large old Pablo coffee jars and were labeled appropriately with old fashioned labels and stuck onto the jars with tape. She would tell me that scones don't like to be handled, that the less you handle them the fluffier the scone would be. She would measure the flour and sugar into a bowl and rub in the butter using only her finger tips until the flour resembled fine bread crumbs. Next she would make a well in the flour and add both the milk and water at the same time. Using a knife she would then work the flour into a sticky dough, after turning the dough onto a lightly floured bench she would gently kneed the mixture for only a few moments, she would shape the dough into a square and cut the scones into shape from from it, she would place each scone as if pieces of a puzzle onto a greased tray, glaze them with a little milk and then bake them in the oven until golden in colour and heavenly in smell.

As I grew older and I became an independent youth I would attempt to bake my own scones, I would try different recipes from different cookbooks, some of them were successful, others were disastrous. I once made lemonade scones that, once baked could have been used as weapons of mass destruction, needless to say they ended up in the rubbish and I was left feeling deflated, yet as the saying goes, if you fall off your horse you've got to get straight back on again.

After many years of trials I have now mastered the art of baking scones, my competitive streak shining through as I bake my scones and share them at family events, waiting for my mother to comment on my efforts, needless to say her scones are always better in taste to mine in her books, although, I know that my scones are the "bomb!"

Yesterday morning I treated the girls in the office to Devon shire Tea, I placed 2 1/2 cups of Self Raising Flour into a bowl with 2 Table Spoons of Caster Sugar and using my finger tips I gently rubbed in 30 Grams of Butter. After my mixture has morphed into fine bread crumbs I made a well in the center and add 3/4 of a Cup of Milk and 1/2 a Cup of Water. Using a knife I formed the dough by working the mixture from the sides to the center of the bowl, I turn the dough onto a floured surface and as not to upset it and cause it to become tough, I kneed it sparingly and then cut my scones from it using a scone cutter, I place them onto a lined biscuit tray, I bake them in a moderate oven as my mother did until they are golden brown.

Once cooked I wrap my scones in a clean tea towel and journey them with me to work, stopping at the local shop along the way for a fresh tub of double dollop cream and a jar of strawberry jam, I also packed some of Lady Flo's lemon butter that I had made last week.

Needless to say my scones were a hit and a well earned distraction at work, they disappeared one scone at a time, and the lemon butter was a popular topic of conversation. Another successful morning in the kitchen, leaving me feeling self satisfied and truly happy.

You now have my recipe for delicious golden scones, don't just say "ONE day I will give that recipe a go." Do it now, there is of course no time like the present. Enjoy it, and remember, if at first you don't succeed try, try again!

Sunday, August 8, 2010

Little Cakes

Cupcakes, or as they were called when I was a little girl Patty Cakes are a delightful substitute to the common birthday cake, when arranged on a tower they look magnificent and have those that admire at them "oohing" and "Arhing" at the sight of them.

I woke at 7am yesterday morning and baked four dozen butter cup cakes for my friends children's birthday parties, I used a foundation recipe that I had originally taken from the "Cookery the Australian Way" cook book which was first published in 1966,  being over forty years old the recipes in this book are easy to follow, with the sweet treats simple, delicious old fashioned delights.

I beat into a frenzy 185 grams of butter with 3/4 a cup of caster sugar using an electric mixer until it is a delightful creamy texture, I then add three lightly beaten eggs a small amount at a time, until the mixture is as smooth as a babies bottom, this is an ideal time for tasting, the smooth, rich buttery mixture can't be topped in my books for taste. Using a wooden spoon I then add 2 1/2 cups of self raising flour a small amount at a time alternating with 1/2 a cup of milk, the batter will be thick yet smooth in texture, I add extra milk allowing the batter to fall from a spoon if held in the air, it should still be thick enough for a wooden spoon to stand in it. I then spoon the batter into prepared patty pans and bake in my tired old oven until they are golden at 160 degrees. Once cooled I pipe butter icing onto my little cake creation and decorate them with pride.

After decorating my brightly coloured creations I packed them into my new best friend the cupcake carry container and my husband and I then travelled to our friends place for one of the most extremely high energy children's parties I have ever experienced. As we pulled into the driveway on arrival we could hear the children's squeals of delight as they played. We had an adult cause a diversion to distract the kids as my husband and I along with some friends smuggled containers of brightly coloured little cakes into the kitchen.

After dinner we arranged the little cakes on a four tier cupcake stand, we surprised the birthday boys and girl with an exciting assortment of delicious morsels, their eyes widened and fingers twitched as they belted out "Happy Birthday" at the top of their lungs before diving at the cakes with haste.

Cupcakes are a perfect mouthful of cake for children, keeping their sugar intake to a minimum whilst at the same time wowing the kids with their presentation. Not only are they delicious and moreish to eat, they are fun to create, I challenge you to take the plunge and bake some "from scratch" cupcakes today, if you can tear open a packet cake sachet and pour powder into a bowl you can definitely bake a butter cake with no added preservatives. Go on, get to it, happy baking, I promise that you will love it!

Tuesday, August 3, 2010

Lemon Butter Memories.


My dear old gran who died two years ago three days before her 90th Birthday was a Zen Master in the kitchen, she, as she would tell it raised five children post second world war and learnt to make do with what she had when it came to meal times as food coupons were scarce.

 I can remember standing at the stove top at my parents place watching as gran would turn the mutant bush lemons that grew outside the kitchen window into jars filled with sweet yet sour lemon butter, it was rich yellow in colour and deffinately rich in taste, as you ate it your lips would automatically smack together and you could feel your gums tingling with delight at every mouthful.

She would bottle up her creation in odd shaped jars from the collection in mums pantry and then with all the love in the world she would travel some days by foot to the local nursing homes and share it with who she would call her oldies, some of these oldies being ten years her junior. She was a selfless woman, doing things for others and leaving herself last to be served.

Two years after my grans death and over thirty years since I would struggle to look over the stove top as she would stir the ingredients in the saucepan gently wth a wooden spoon I can still remember this delightful memory, I can taste the freshly squeezed lemon in the air and I can remember gran wacking my hands with the spoon as I attempted to sneak a preview of the best lemon butter I have ever tasted.

After a visit to my dads and being gifted with a coles bag filled with large ripe lemons I decided to attempt making lemon butter in tribute to my gran. One thing I must stress to anyone out there that may be reading this is to remember to remove the sticker from the fruit before you attempt to finely grate the rind from it.

I decided not to use my grans lemon butter recipe, instead I used a recipe out of one of the cook books that she left to me when she died. Lady Flo Bieke-Petersens Classic Country Cooking, I whisk the eggs, grated the rind and juiced the lemons, I placed all the required ingredients into a heavy based saucepan and like my gran would do I stood at the stove with a wooden spoon in hand and lovingly stired the mixture as it thickened into what I know lemon butter to be. I then poured it into warm, oddly shaped jars and stored it in the fridge to chill.

This evening when I returned home from work with a loaf of fresh bread I smoothered it with my lemon butter creation and ate it with passion, my lips smacked and my gums tingled, a memory had been reborned and I found myself wanting to eat it tll it was gone.

Monday, August 2, 2010

An introduction

I was once told that to be truly happy you should participate in an activity that allows you to feel truly alive. I can not explain how baking makes me feel, I can however tell you that watching a person bite into one of my creations and smile as they wipe their chin is a feeling of not only great joy for me, but for the individual that takes that bite it has allowed them to eacape for a fraction of a moment from the hype of the world that sourounds them.

Baking has always been a fetish of mine, in primary school I would enter my baking attempts into the local show, back then the show was more of a country fair with baking still being quite the done thing. I was once named the Junior Boild Fruit Cake Champion, I still have the ribbon yet the date of my win escapes me, I am possitive it was in the early 1980's, I was in grade seven and very proud indeed. My Chocolate Fudge also raised eyebrows with a white card printed in blue was placed by the plate I submitted it on, 1st place, an acheivement to be proud of, and something that I was truly great at.

To this day baking releases a ray of sunshine from within me, I not only enjoy the process of baking, I succeed at it. Tonight I baked biscuits for the girls at work, a plain biscuit rich in butter and brown sugar, I pushed a jube onto some of them and chocolate freckles onto others, the sampling process is vital, without tasting your product you will never know just how delightful it is, besides, if you don't eat your fatty foods, you will never acheive quality cellulite.

My name is Bronwyn, I am a compulsive cook and I wish to share my baking adventures with you.